
 My dear friend in Texas has been spending some of her extra time helping me proof read my work and I really wanted to send her a thank you. Her taste is never frilly or too ornate instead she enjoys a more primitive décor. So, I have been working on a rustic rag festooning for her. Since she is in Texas, that means a star should be incorporated into the project. Enter the making of a stick star or wicker star as others have called them! They are popping up everywhere, big and small, floating over fireplace mantels and swinging from front patios. Beauty is in the detailing.
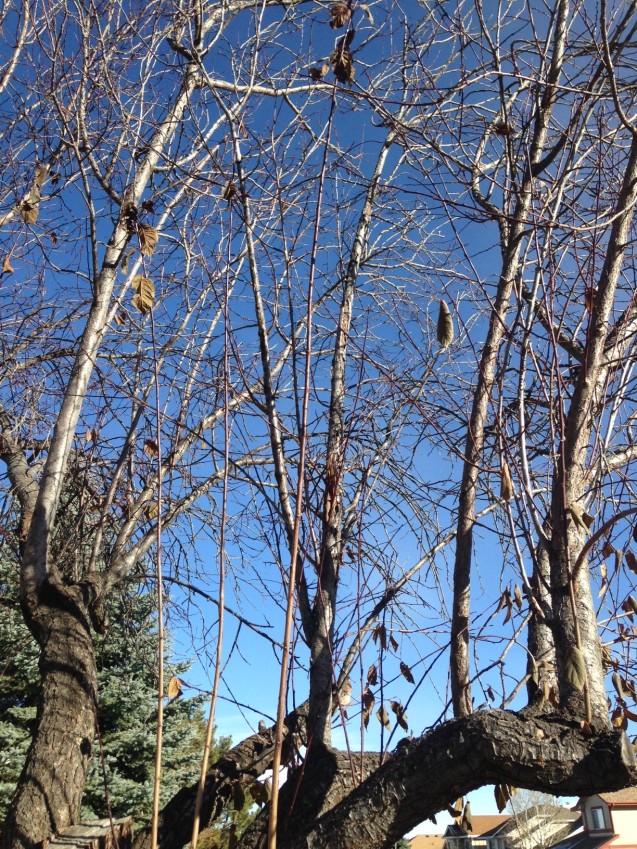
It is the perfect season to make them here in the Rockies. The leaves have fallen, showing the bare bones of the trees which makes it very easy to spot a perfect branch for this project. What you want to avoid is a dry stick. They break easily and are a waste of time. You are looking for a branch that is thick enough to be sturdy but still has some bend to it.
If you look closely, in the center of my tree, you will spot a small group of branches that have grown straight. This is just what we are looking for.
Cut five pieces of branch to match in size

Band two sticks together at the top

Add two sticks to either side and band at the bottom

Now, rotate the two outer sticks so that they go behind all of the other sticks.
(I missed a picture here so only one is positioned properly.)
(In fact I am not sure how I even got this shot.)

The last stick is tied across the front, meeting up with the two back sticks.
(It is here that you will be glad your branch has some bend to it.)

Trim your string and work a bit to position your star to your liking.

Simple…Yes?
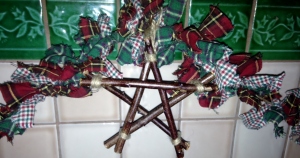
If you are making larger stars, it might be easier to use rubber bands, then tie your sting over the top, and last cut the rubber bands out. I use fresh rubber bands and never leave them on because they snap after time. A quick spray of paint can help you to tie your color palette together and really get your deco on. I am thinking white on white for front door this year!
Now, I am off to sneak in a burlap bow and some woodland graphics as a final touch on this project. Wishing you a Merry Making of much!
